
Let’s face it: tiling is one of those home improvement projects that can either make your space look incredible or leave you with a bunch of crooked, uneven tiles. I’ve been there before, trying to get that perfect tile layout and dealing with what seems like endless complications.
But trust me, with a little planning and some professional tricks, you can nail your tile installation like a pro. Here’s my go-to guide, based on real-life experience, to help you achieve a professional finish.
Why Does Preparation Matter in Tile Installation?
Picture this: you’ve spent hours picking out your tiles, the mortar’s ready, and you’re ready to dive in. But wait—before you even think about sticking that first tile, you need to get your surface prep just right. I can’t stress enough how essential a smooth, level foundation is to the success of your project.
Surface Prep Is Non-Negotiable
I’ve learned the hard way that not all floors or walls are created equal. A perfectly level surface is the key to preventing future tile headaches. Use a long spirit level to check for any dips or bumps, and make sure the surface is dry and rigid.
The Tile Council of North America suggests that for floors, no variation should exceed 1/4″ over 10 feet. If your surface is anything but smooth, consider using a cement backer board or waterproof membrane. This ensures no cracks down the road and gives you the best surface to work with.
I learned this lesson after I tried skipping this step on my first DIY tile project—let’s just say it didn’t end well. Trust me, prep is where the magic begins!
How Do You Plan Your Tile Layout?
The next key step is layout. You might think that starting at the wall is the easiest route, but it’s actually a rookie mistake. I used to just go with what seemed simplest—start at the wall, lay my first tile, and keep going.
Wrong! When you start with the wall, chances are the wall isn’t perfectly square, and that’s going to throw your whole pattern off.
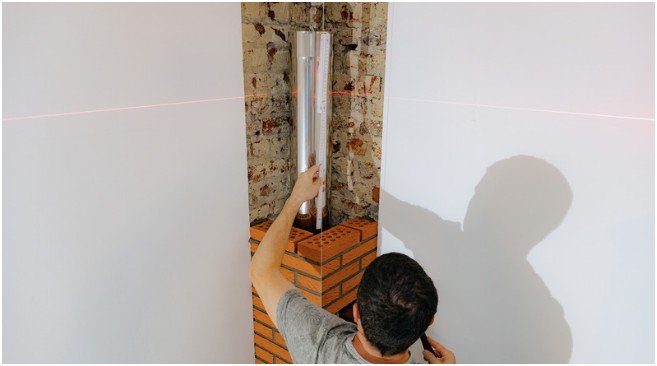
The Secret to a Balanced Layout: Start from the Center
Instead, I now always find the center of the room and work my way out. Here’s the trick: snap two chalk lines from the center point, creating a cross.
This allows you to maintain symmetry as you go along. Plus, it helps me avoid the dreaded “sliver cuts” at the edges. Nobody wants a tiny sliver of tile around the perimeter—especially not me, and definitely not you.
Dry-Lay First to Visualize
Before committing to any adhesive, I take the time to dry-lay the tiles. This means I arrange them in place without any glue, just to see how the pattern looks and where the cuts fall.
This has saved me countless headaches, as I’ve avoided making cuts I didn’t need to and made sure the tiles fit where they should. I recommend doing this step—it only takes a few minutes and will save you so much frustration in the long run.
What’s the Best Way to Set Tiles?
Alright, you’ve prepped, laid out your design, and now it’s time for the fun part: setting the tiles. But don’t rush this step. It’s easy to get excited and think the hard work is over, but if you skip a few professional techniques, you’ll end up with tiles that are uneven or worse, cracked.
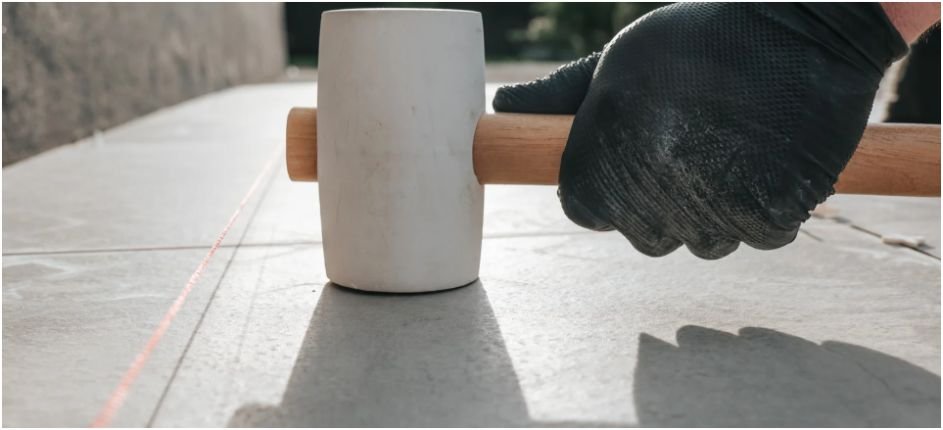
Use a Tile Leveling System to Prevent Lippage
One of my best tile installation tips is to use a tile leveling system. This is a game-changer for ensuring that your tiles are completely flush with each other. Tile leveling clips and wedges work wonders, especially with larger tiles.
Without them, you might end up with “lippage,” where one tile sticks up higher than the one next to it. Trust me, this is something you don’t want. Leveling clips will keep everything perfectly aligned.
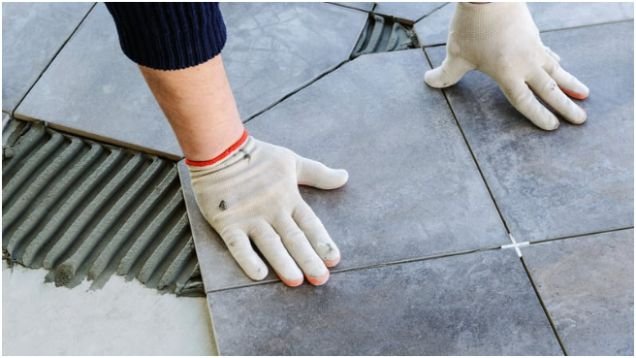
Back-Butter Large Tiles for Maximum Adhesion
For larger tiles or natural stone, I always “back-butter” the tile before laying it down. This means I apply a thin layer of mortar to the back of the tile in addition to the floor. It ensures the tile adheres evenly and eliminates any air pockets. Don’t skip this step—it’s worth the extra time.
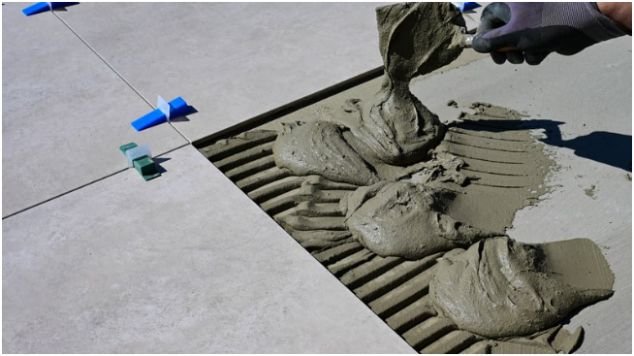
Directional Troweling: No Swirls Allowed
Another tip I swear by is directional troweling. Instead of making swirls, I apply the adhesive in straight, parallel lines. This helps air escape and maximizes mortar-to-tile contact.
And when you’re working with large tiles, be sure to use the right trowel. Larger tiles need a deeper notch (think 1/2″ trowel), while smaller tiles can get away with a 1/4″ trowel.
How Do You Finish Your Tile Installation?
Now that the tiles are set, you’re almost there! But don’t rush the finishing touches. Grouting and sealing can make or break your tile job.
Clean as You Go
One of the best pieces of advice I can give is to clean as you go. Immediately wipe off excess thinset from the tile surface and grout joints with a damp sponge. If you let it sit too long, it becomes rock-hard and impossible to clean. Trust me, I’ve spent way too much time scrubbing dried thinset off tiles, and it’s not fun.
Wait Before Grouting
Once your thinset has cured (typically 24 hours), it’s time to grout. I always make sure to wait long enough to let the mortar bond fully. This ensures no discoloration or weakening of the grout bond.
Seal for Longevity
After the grout has cured (typically 48–72 hours), apply a high-quality grout sealer. This will protect your tiles and grout from stains and moisture damage, extending the life of your beautiful floor.
FAQ
1. Can I tile over existing tile?
Yes, you can tile over existing tile, but it’s not always the best choice. It depends on the condition of the existing tile and surface. I’ve done it, but I always make sure the tiles are clean and the surface is level. Sometimes, removing the old tile is a cleaner, more reliable option.
2. How long does it take for tiles to set before grouting?
It typically takes 24 hours for the thinset to set before you can grout. However, I recommend waiting 48 hours to be safe, especially if you’ve used a heavy mortar or are working in a damp area like a bathroom.
3. Can I use any type of grout for my tile?
Not all grouts are the same. You’ll want to select the right grout based on the tile type and application. For instance, I use epoxy grout for high-moisture areas like bathrooms, as it’s more resistant to water. For floors, cement-based grout works well and is easier to work with.
Done and Dusted: A Pro Tile Job on Your Own Terms!
Tile installation doesn’t have to be a stressful or intimidating task. With the right tools, a little prep work, and some strategic thinking, you can achieve that professional finish every time.
As you embark on your next tile project, remember: the prep work pays off in spades. Take your time, follow these steps, and enjoy the process. Before you know it, you’ll be admiring your perfectly laid floor (and showing it off to friends). Keep calm and tile on!